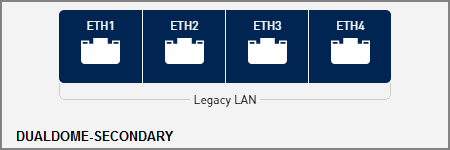
At the web interface for the secondary system, or at the myKVH web portal, select the Dual Dome - Secondary network configuration on the secondary system. Refer to Selecting a Network Configuration for details.
Dual Dome - Secondary Configuration

NOTE: Once the secondary system is configured for Dual Dome-Secondary, you will need to enter 192.168.0.10 (and not minivsat.kvh) to access the secondary system’s web interface.
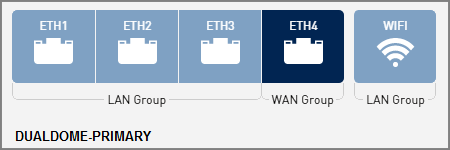
At the web interface for the primary system, or at the myKVH web portal, select the Dual Dome - Primary network configuration on the primary system. Refer to Selecting a Network Configuration for details.
Dual Dome - Primary Configuration

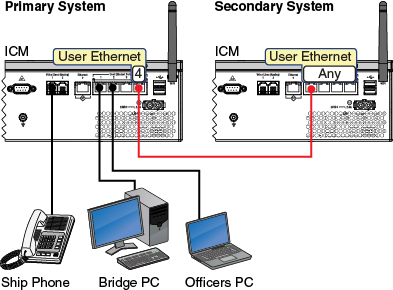
Connect an Ethernet cable from one of the “User Ethernet” ports on the secondary system’s ICM to “User Ethernet” port 4 on the primary system’s ICM.
Dual Dome Wiring (Example)

Connect your computers and/or other network devices to “User Ethernet” ports 1-3 and Wi-Fi on the primary system’s ICM. Use straight-through 100 Mbps fast Ethernet UTP CAT5 cables (or better) with RJ45 connectors.
Make sure all computers are configured for DHCP addressing (see Configuring Computers for DHCP). Devices connected to the primary system’s ICM (via Ethernet cables or Wi-Fi) will receive IP addresses from the ICM via DHCP. The ICM serves as a router.
NOTE: By default, the ICM has a gateway of 192.168.5.1 and assigns IP addresses in the 192.168.5.100-200 range. If this configuration conflicts with an existing onboard network, you may change the settings at the TracPhone V3-IP web interface (go to Settings > Network Settings). See LAN Settings on ICM for details.
To enable the ICM’s built-in wireless access point (WAP) for Wi-Fi access, follow the steps in Wireless Settings.