To configure a no-transmit zone, follow these steps:
Identify the necessary azimuth range for the zone (see Identify the Azimuth Range ).
At the TracPhone V3-IP web interface, configure a no-transmit zone for that azimuth range (see Configure the No-Transmit Zone(s) at the Web Interface ).
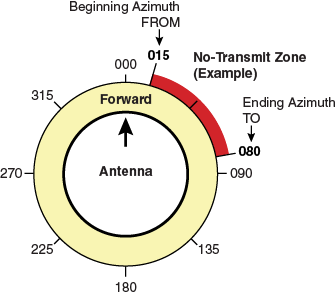
First, you need to determine the necessary azimuth range for the no-transmit zone(s). You will need to enter, in clockwise order, the beginning and ending azimuths that define the outer boundaries of the zone, relative to the antenna’s forward arrow, which should be pointing toward the bow.
NOTE: Each no-transmit zone must span at least 5º. Therefore, be sure to set beginning and ending azimuths at least 5º apart.
Beginning and Ending Azimuths Defining No-Transmit Zone

At the TracPhone V3-IP web interface, click the Settings tab. Then click No-Transmit Zones.
Click Edit.
If the Login window appears, log in with the Administrator password.
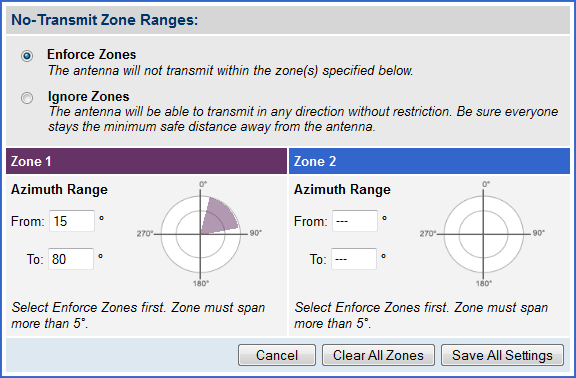
In No-Transmit Zone Ranges, make sure Enforce Zones is selected.
Important! |
When “Enforce Zones” is selected, the antenna will not transmit whenever it points within one of your configured no-transmit zones. If “Ignore Zones” is selected instead, the zones are disabled, allowing the antenna to transmit in any direction without restriction. |
Enter the azimuth range for Zone 1.
If you wish to set up a second no-transmit zone, enter the azimuth range for Zone 2.
Click Save All Settings.
At the confirmation message, click Save.
Configuring No-Transmit Zones
