In Control Panel, double-click Network and Sharing Center. To open the Control Panel, go to the desktop, select Settings from the Charms bar, then select Control Panel.
In Network and Sharing Center, double-click the Ethernet link for the Ethernet connection you are using for mini-VSAT Broadband.
In the Ethernet Status dialog box, click Properties. If this screen doesn’t appear, just skip to Step 4.
In the Ethernet Properties dialog box, on the Networking tab, select Internet Protocol Version 4, and then click Properties.
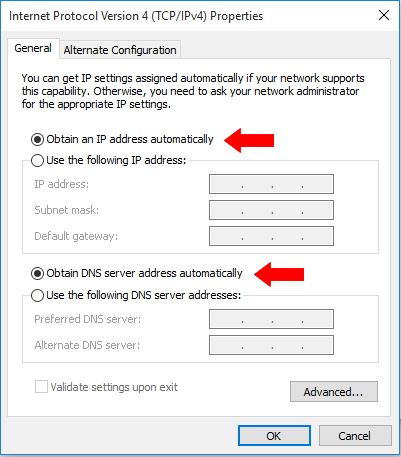
In the Internet Protocol Properties dialog box, select Obtain an IP address automatically and Obtain DNS server address automatically. Then click OK.
Windows 8 - Internet Protocol Properties

In the Ethernet Properties dialog box, click Close. Then click Close in the Ethernet Status dialog box.