In Control Panel, double-click Network Connections. You can find the Control Panel either through the Start menu or “My Computer.”
In Network Connections, double-click the Local Area Connection for the Ethernet connection you are using for mini-VSAT Broadband.
In the Local Area Connection Status dialog box, click the General tab. Then click Properties. If this screen doesn’t appear, simply skip to Step 4.
In the Local Area Connection Properties dialog box, click the General tab, select Internet Protocol (TCP/IP), and then click Properties.
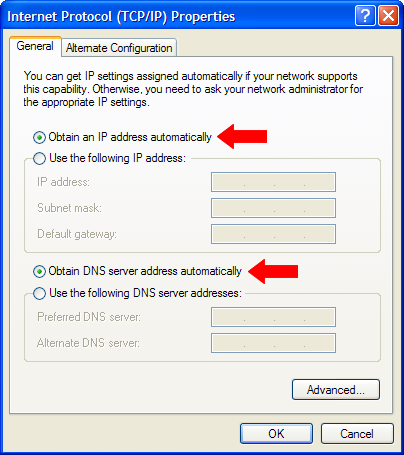
In the Internet Protocol (TCP/IP) Properties dialog box, click the General tab. Then select Obtain an IP address automatically and Obtain DNS server address automatically. Then click OK.
Windows XP - Internet Protocol (TCP/IP) Properties

In the Local Area Connection Properties dialog box, click OK.
Restart your computer.